Integrate Firebase with Clerk
To enable Firebase integration with your Clerk application, you will need to provide Clerk with the required Firebase configuration attributes depending on the Firebase features you would require authenticated user access to.
To get started, go to the Clerk Dashboard and navigate to the Integrations(opens in a new tab) page. Turn on the Firebase integration.
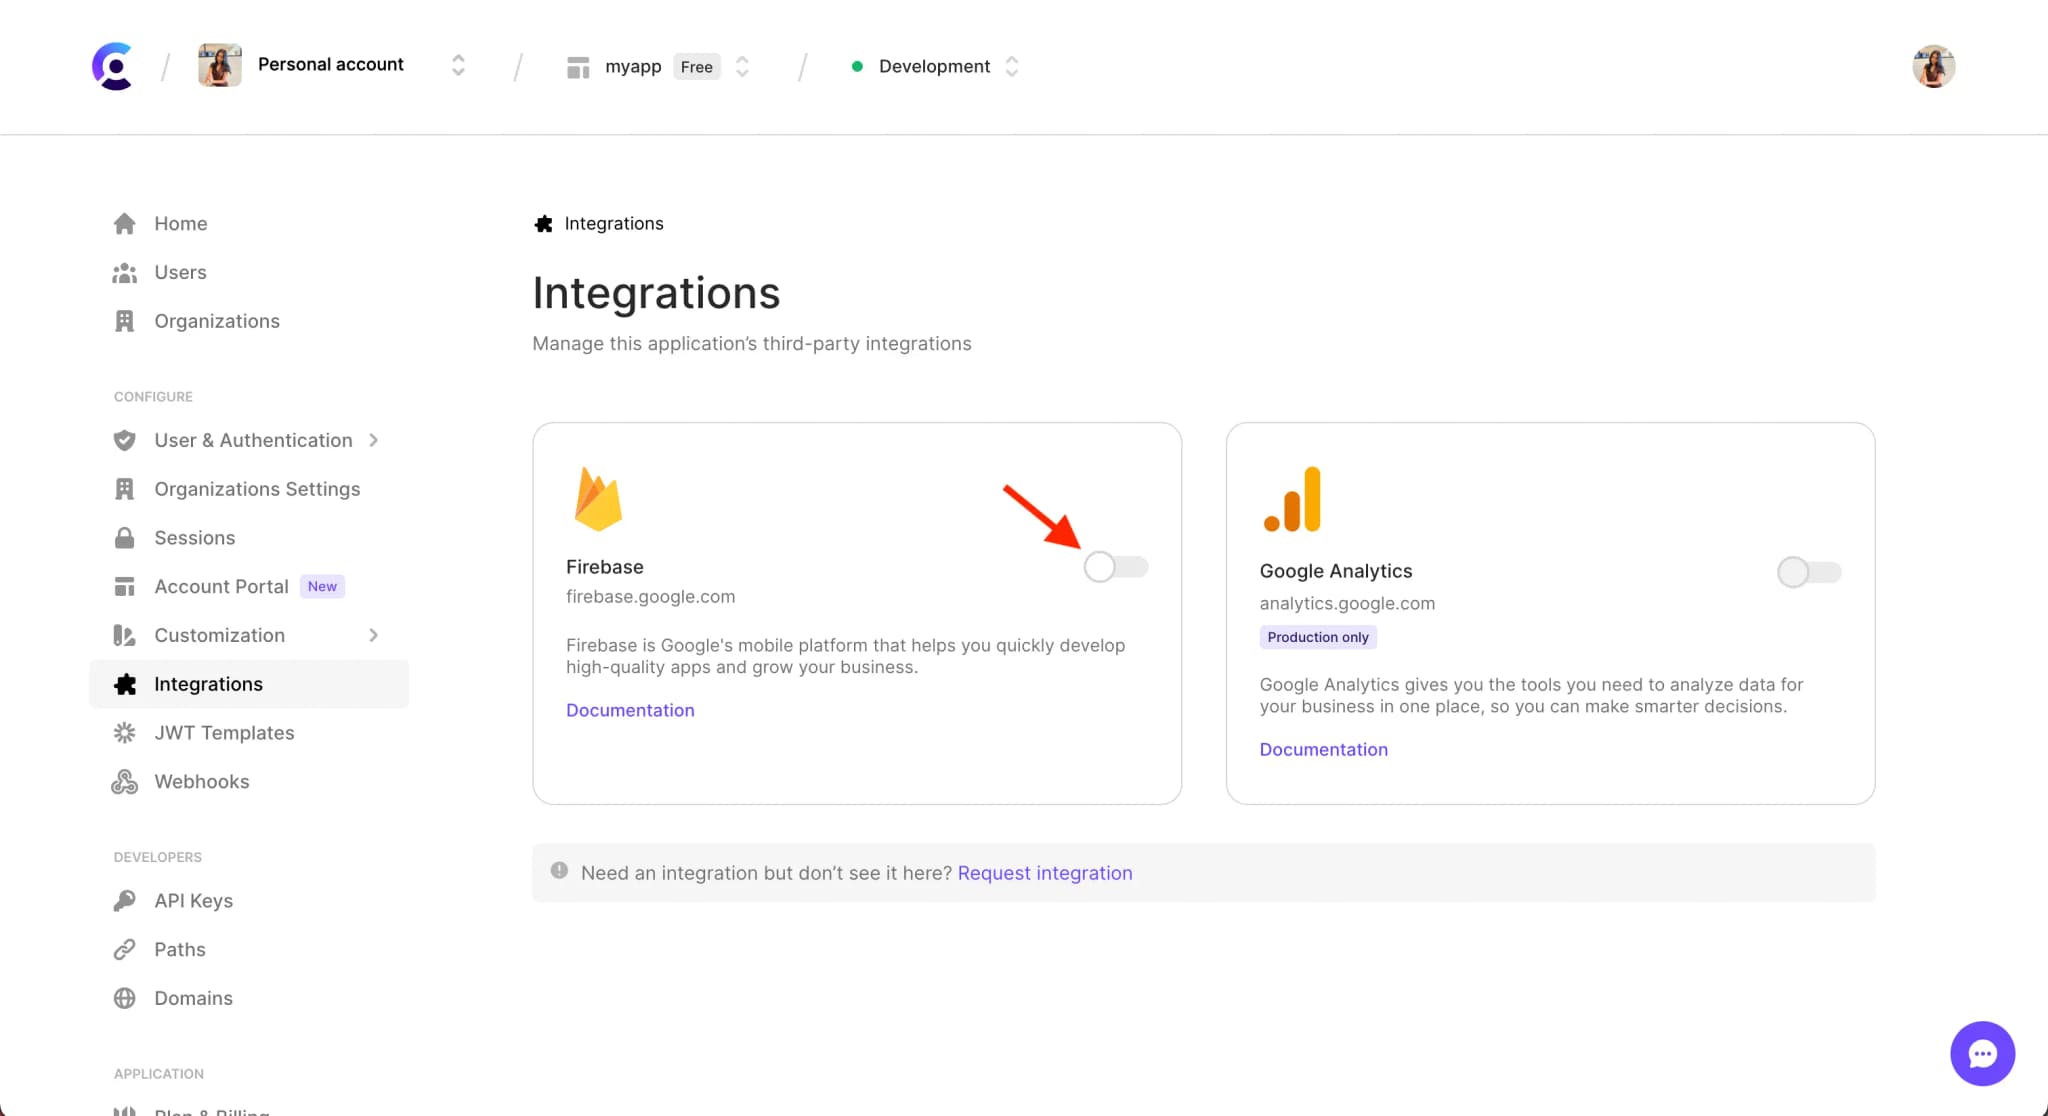
Once enabled, you will be presented with a form to enter the required Firebase configuration attributes.
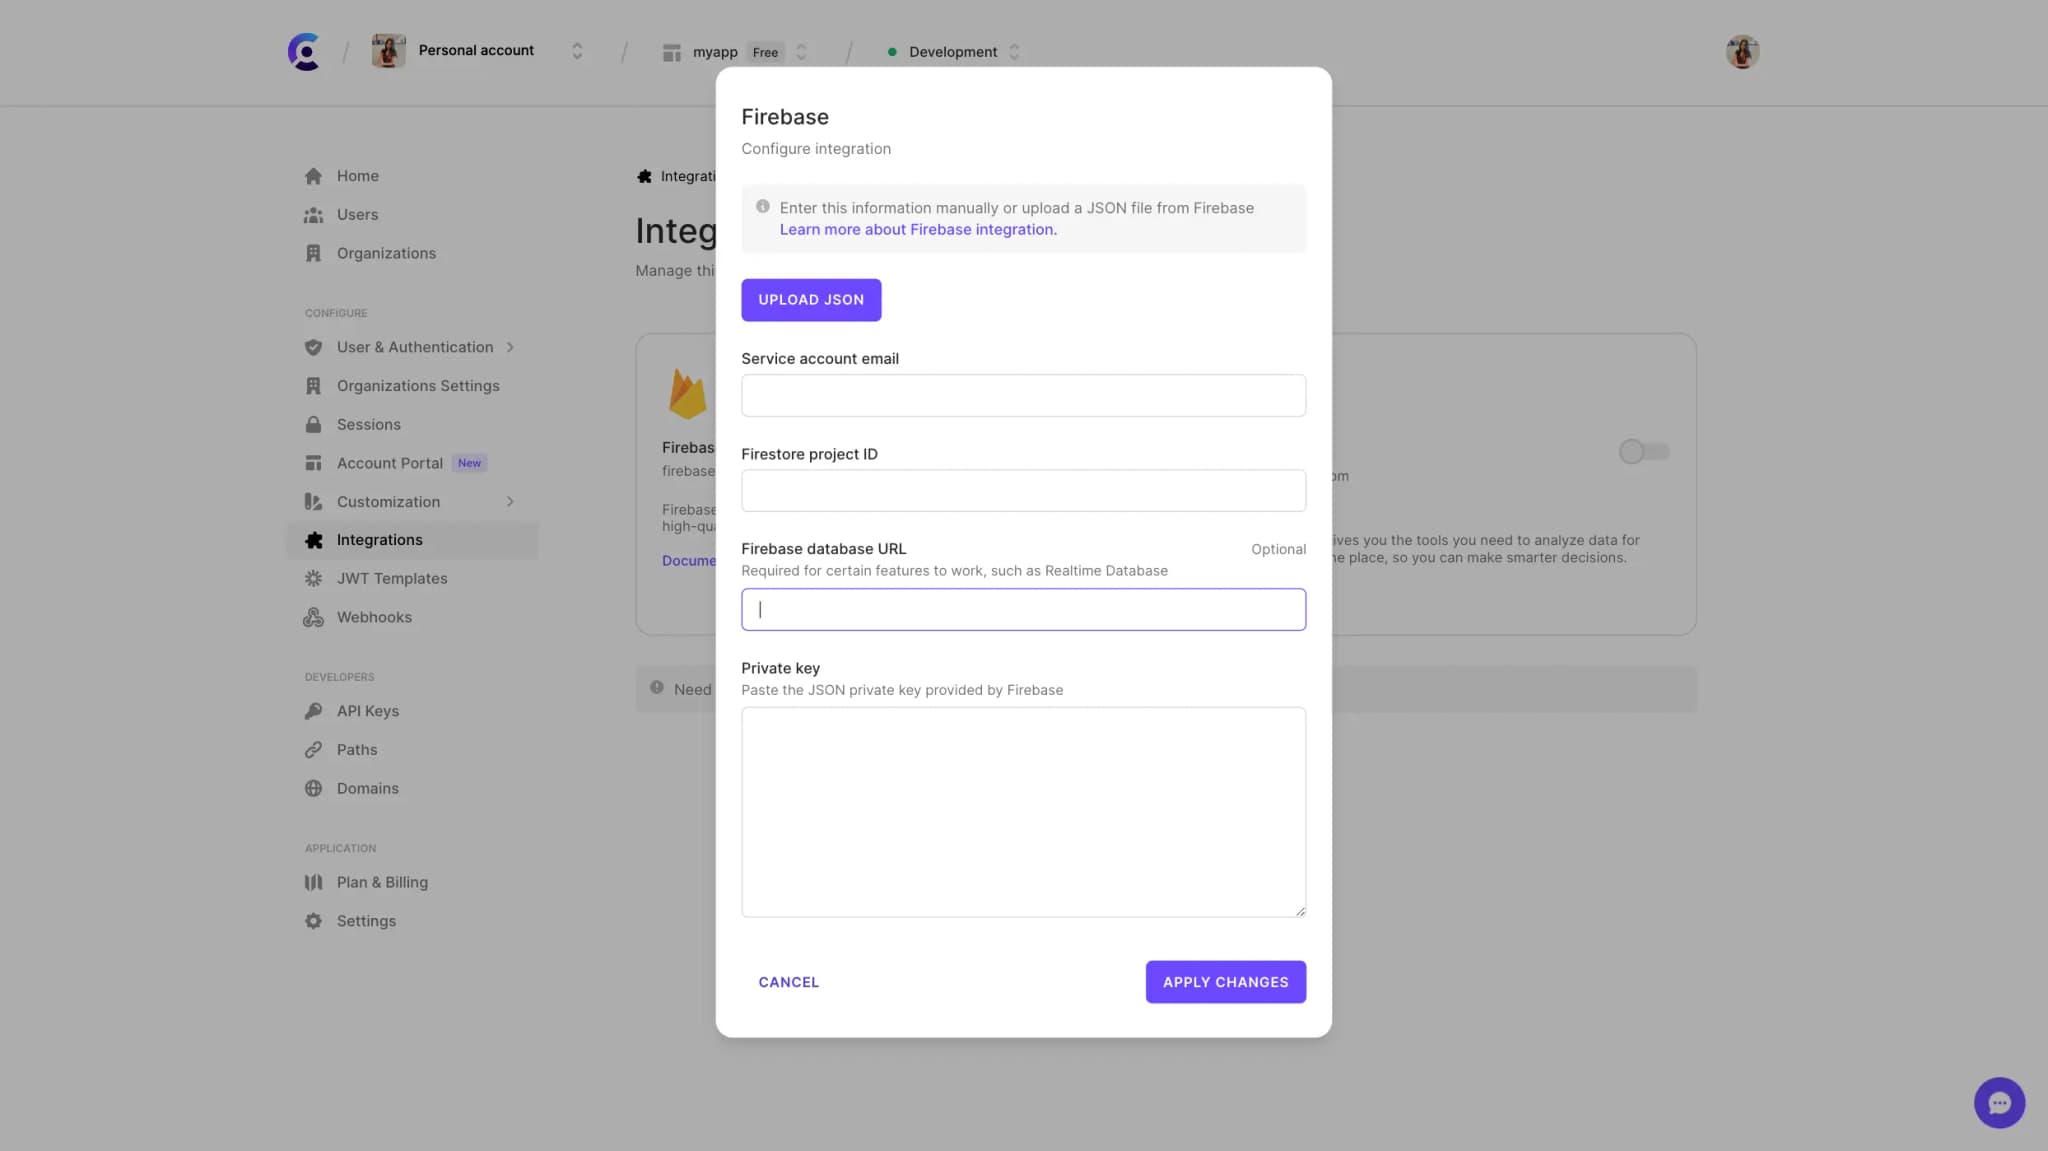
Configuration
To fill out the Firebase configuration form, you can either fill the fields manually or provide a JSON file from Firebase. If you choose to upload the JSON file, the fields will automatically get filled for you.
Upload a JSON Firebase configuration file
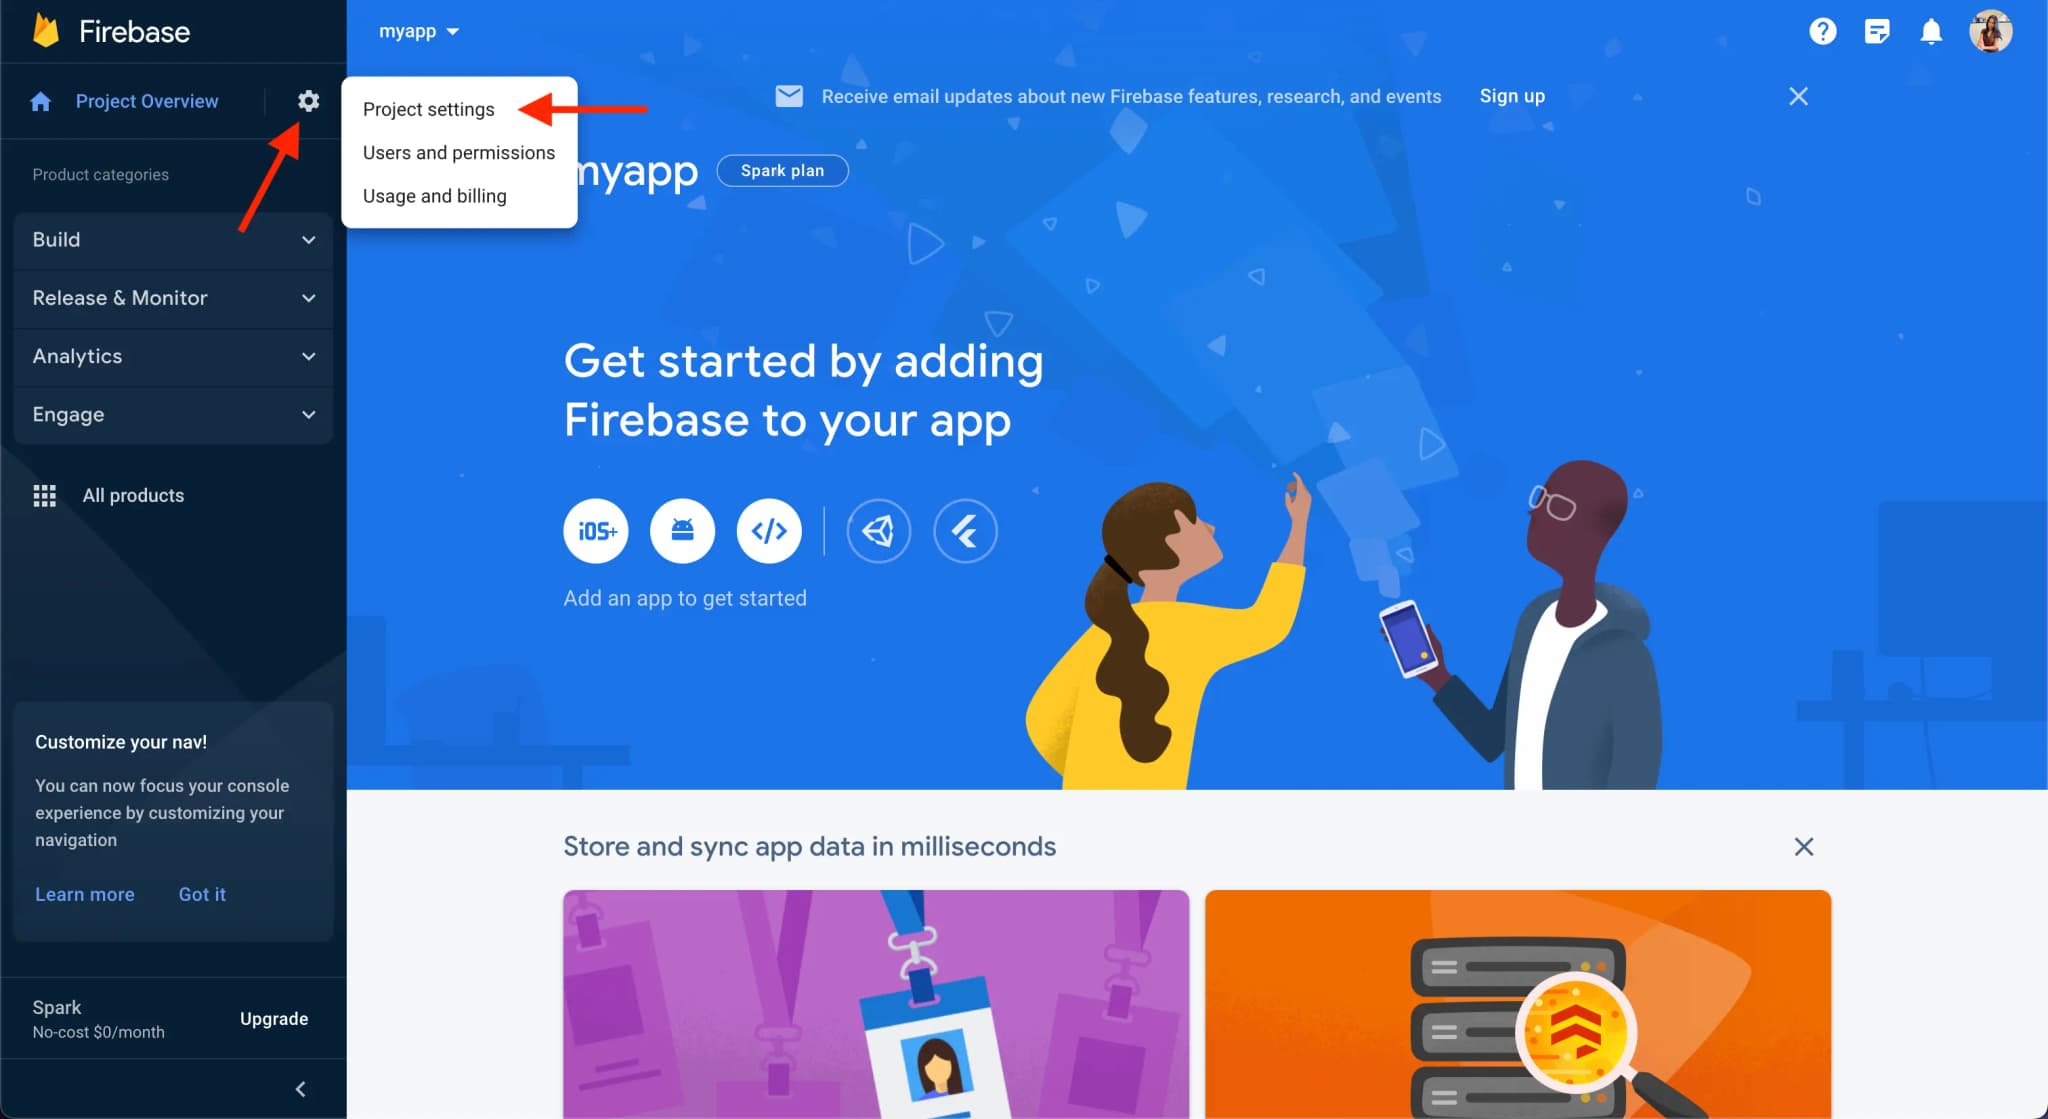
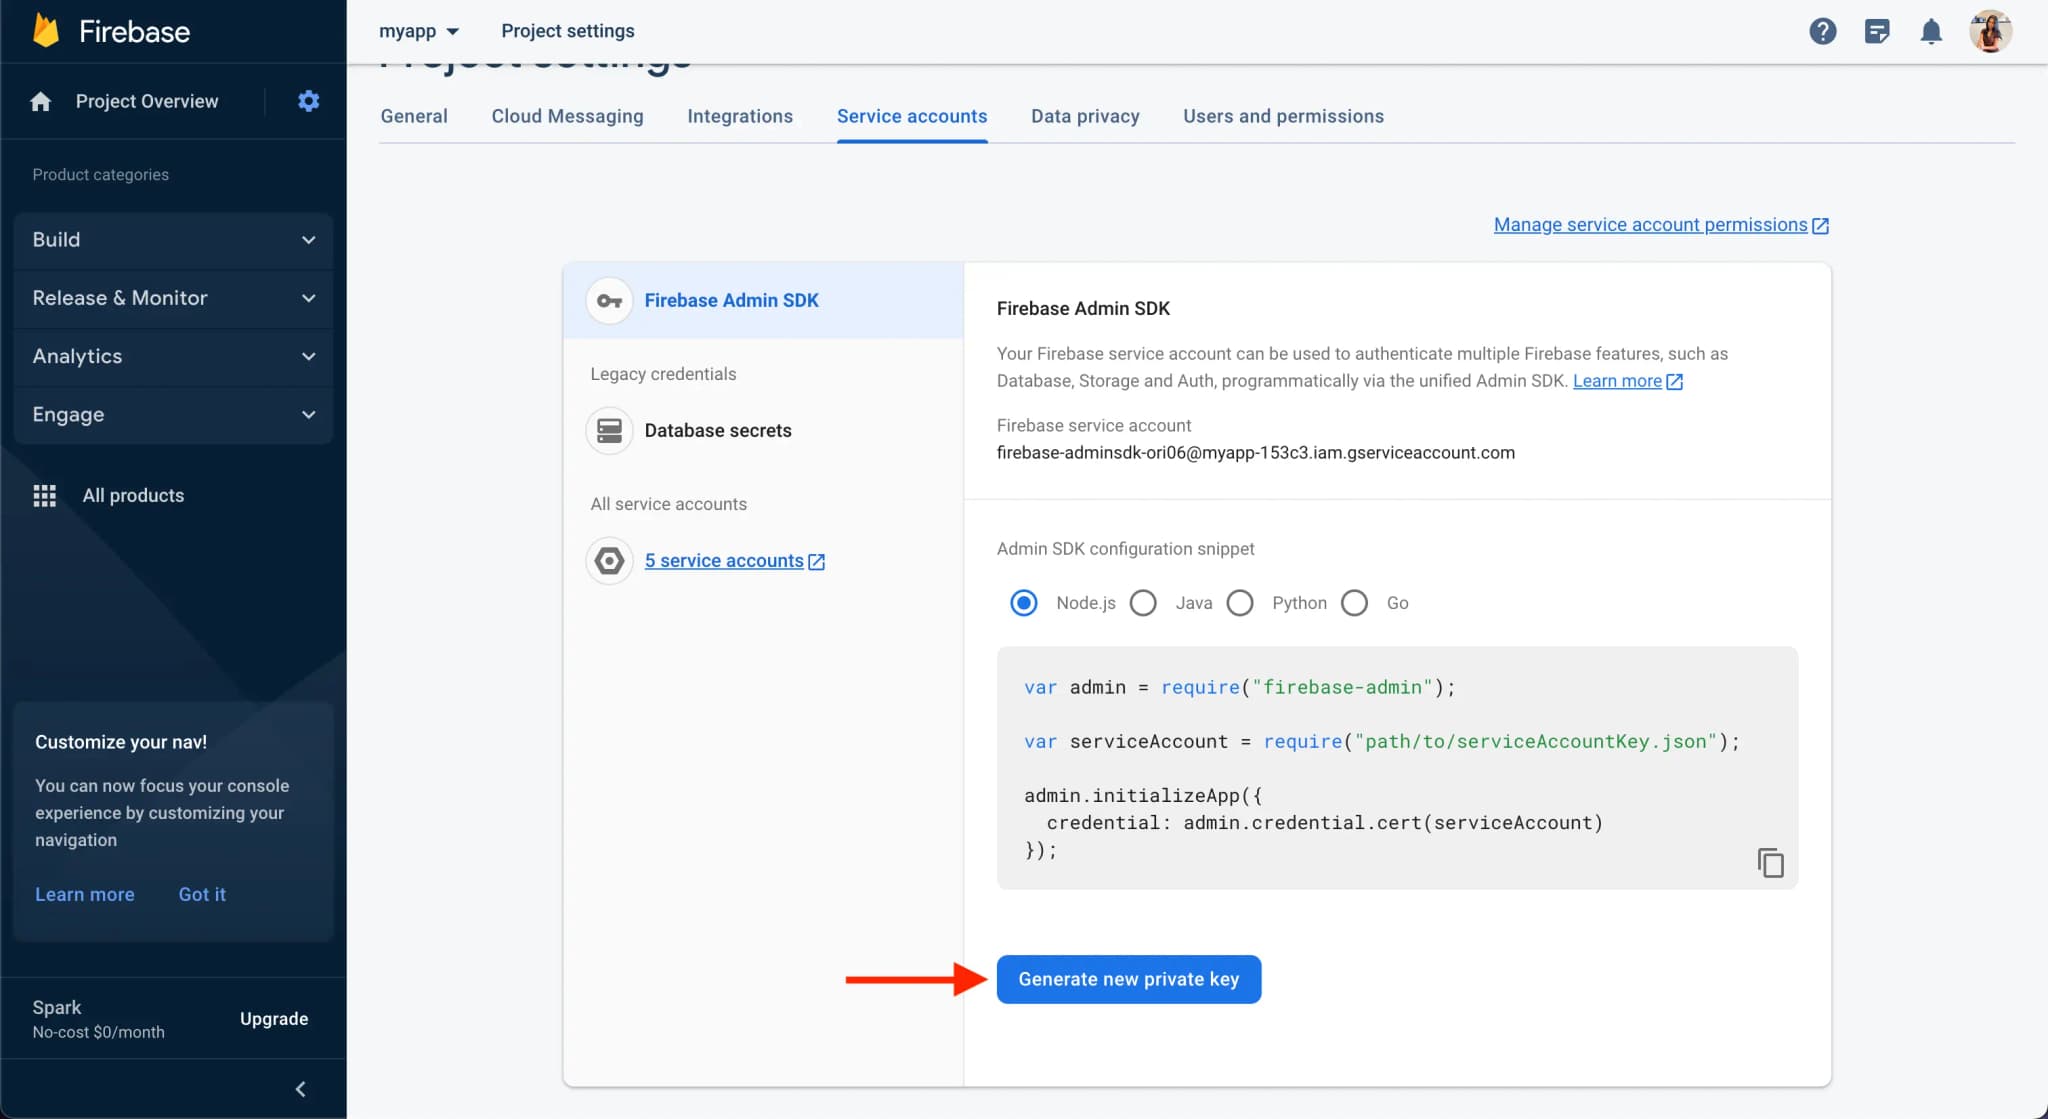
Go to the Firebase console(opens in a new tab) and choose your application. On the Firebase console homepage, click on the settings cog icon in the top left, next to Project Overview. A menu will open. Choose the Project settings option.
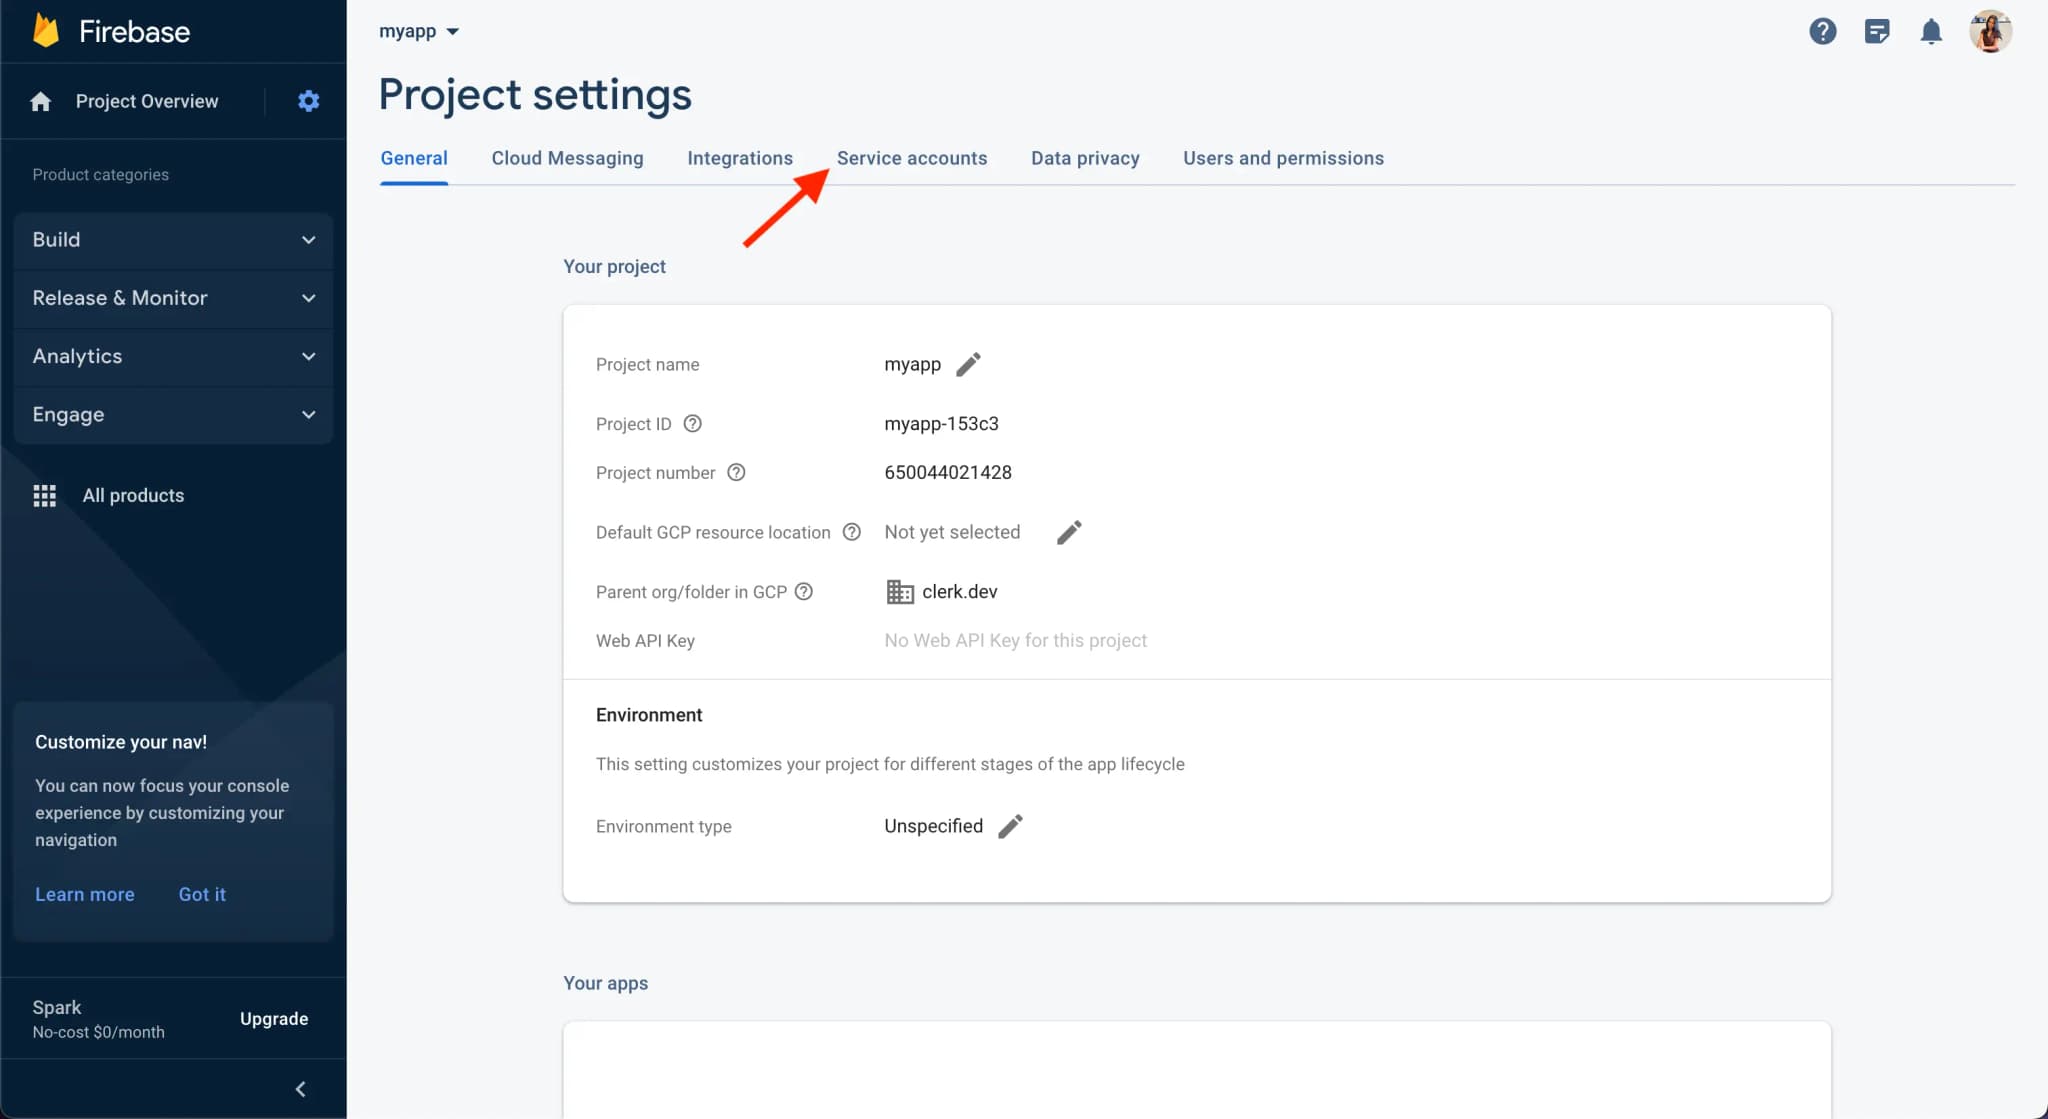
Once you are directed to the Project settings page, click on the Service Accounts tab.
On the Service Accounts page, click on the Generate new private key button.
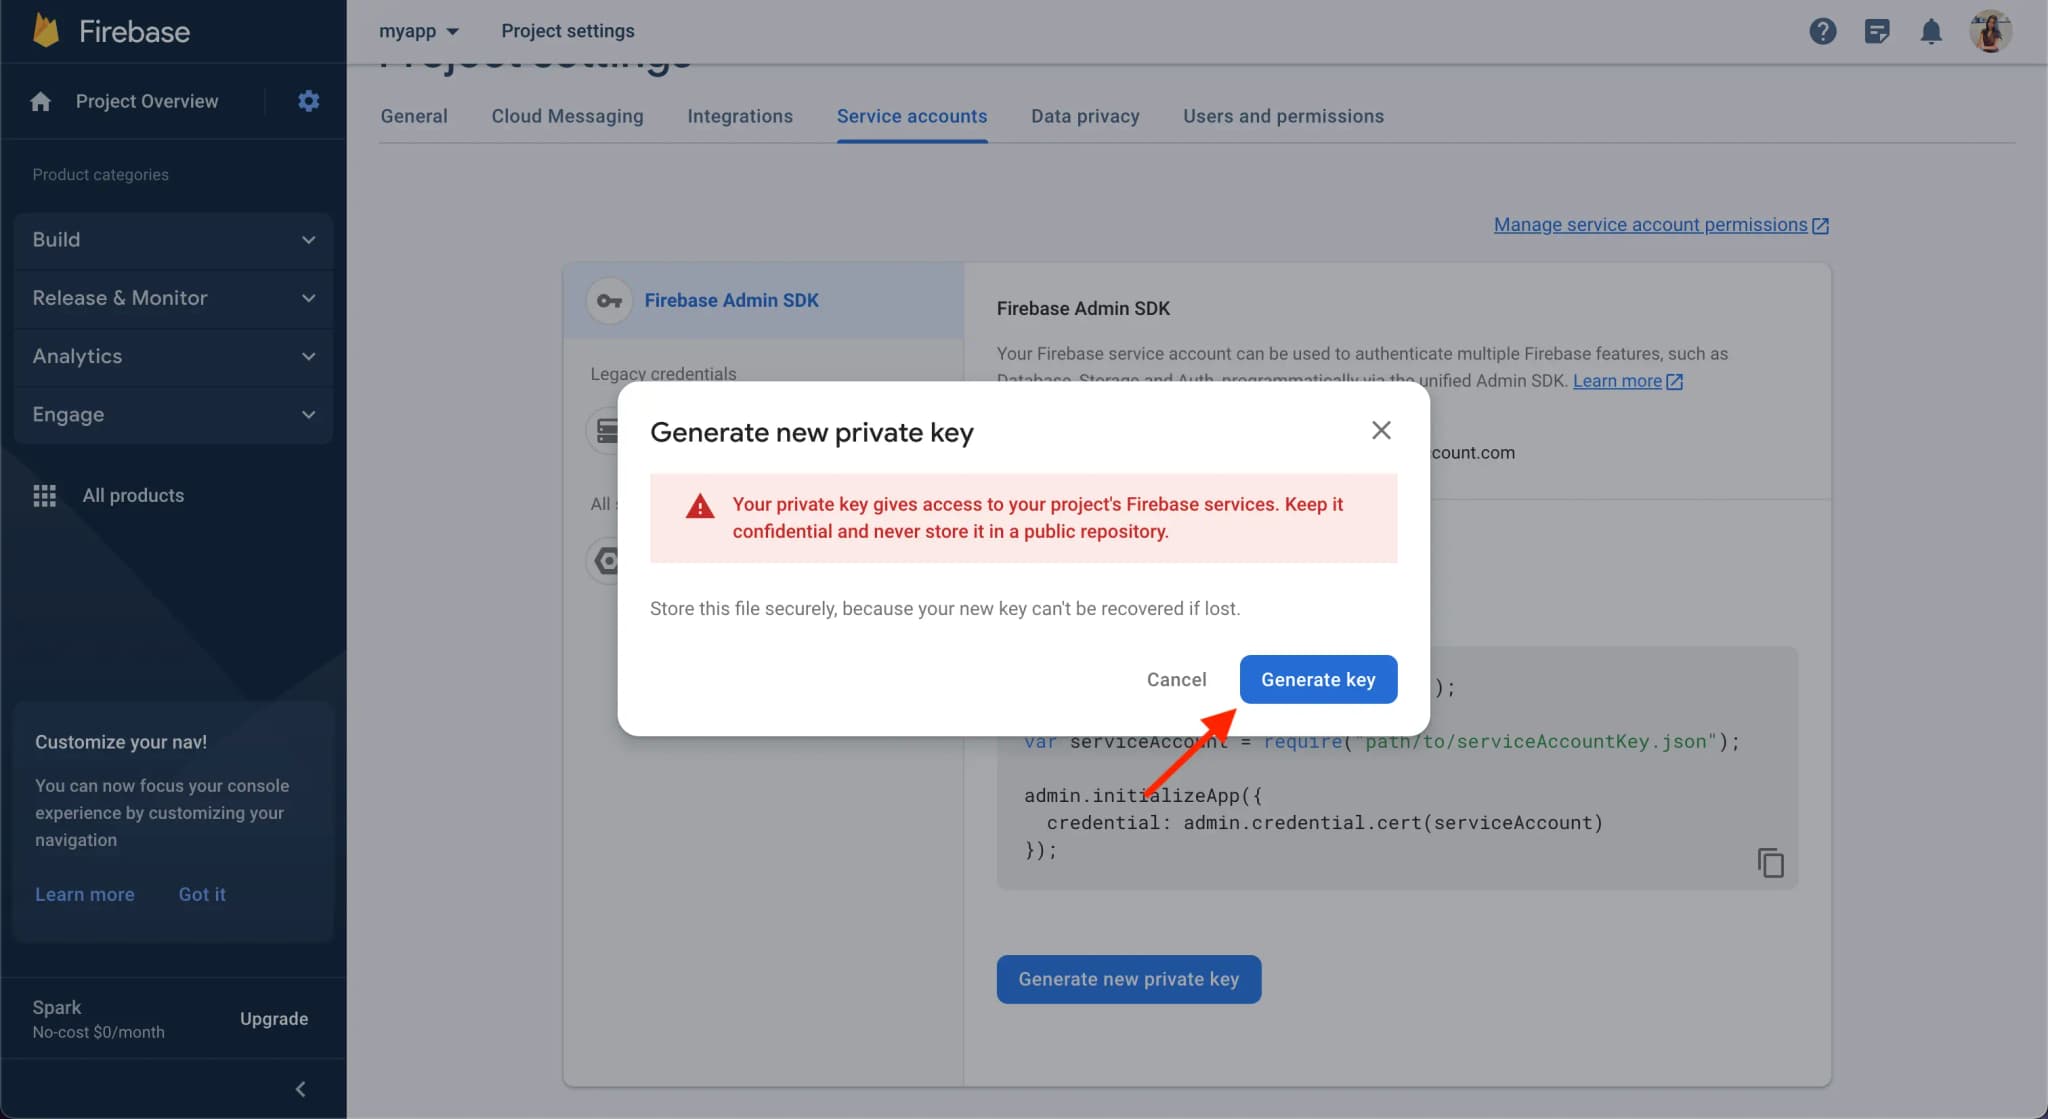
A modal will pop open. Click on the Generate key button. The JSON configuration file will be downloaded to your computer.
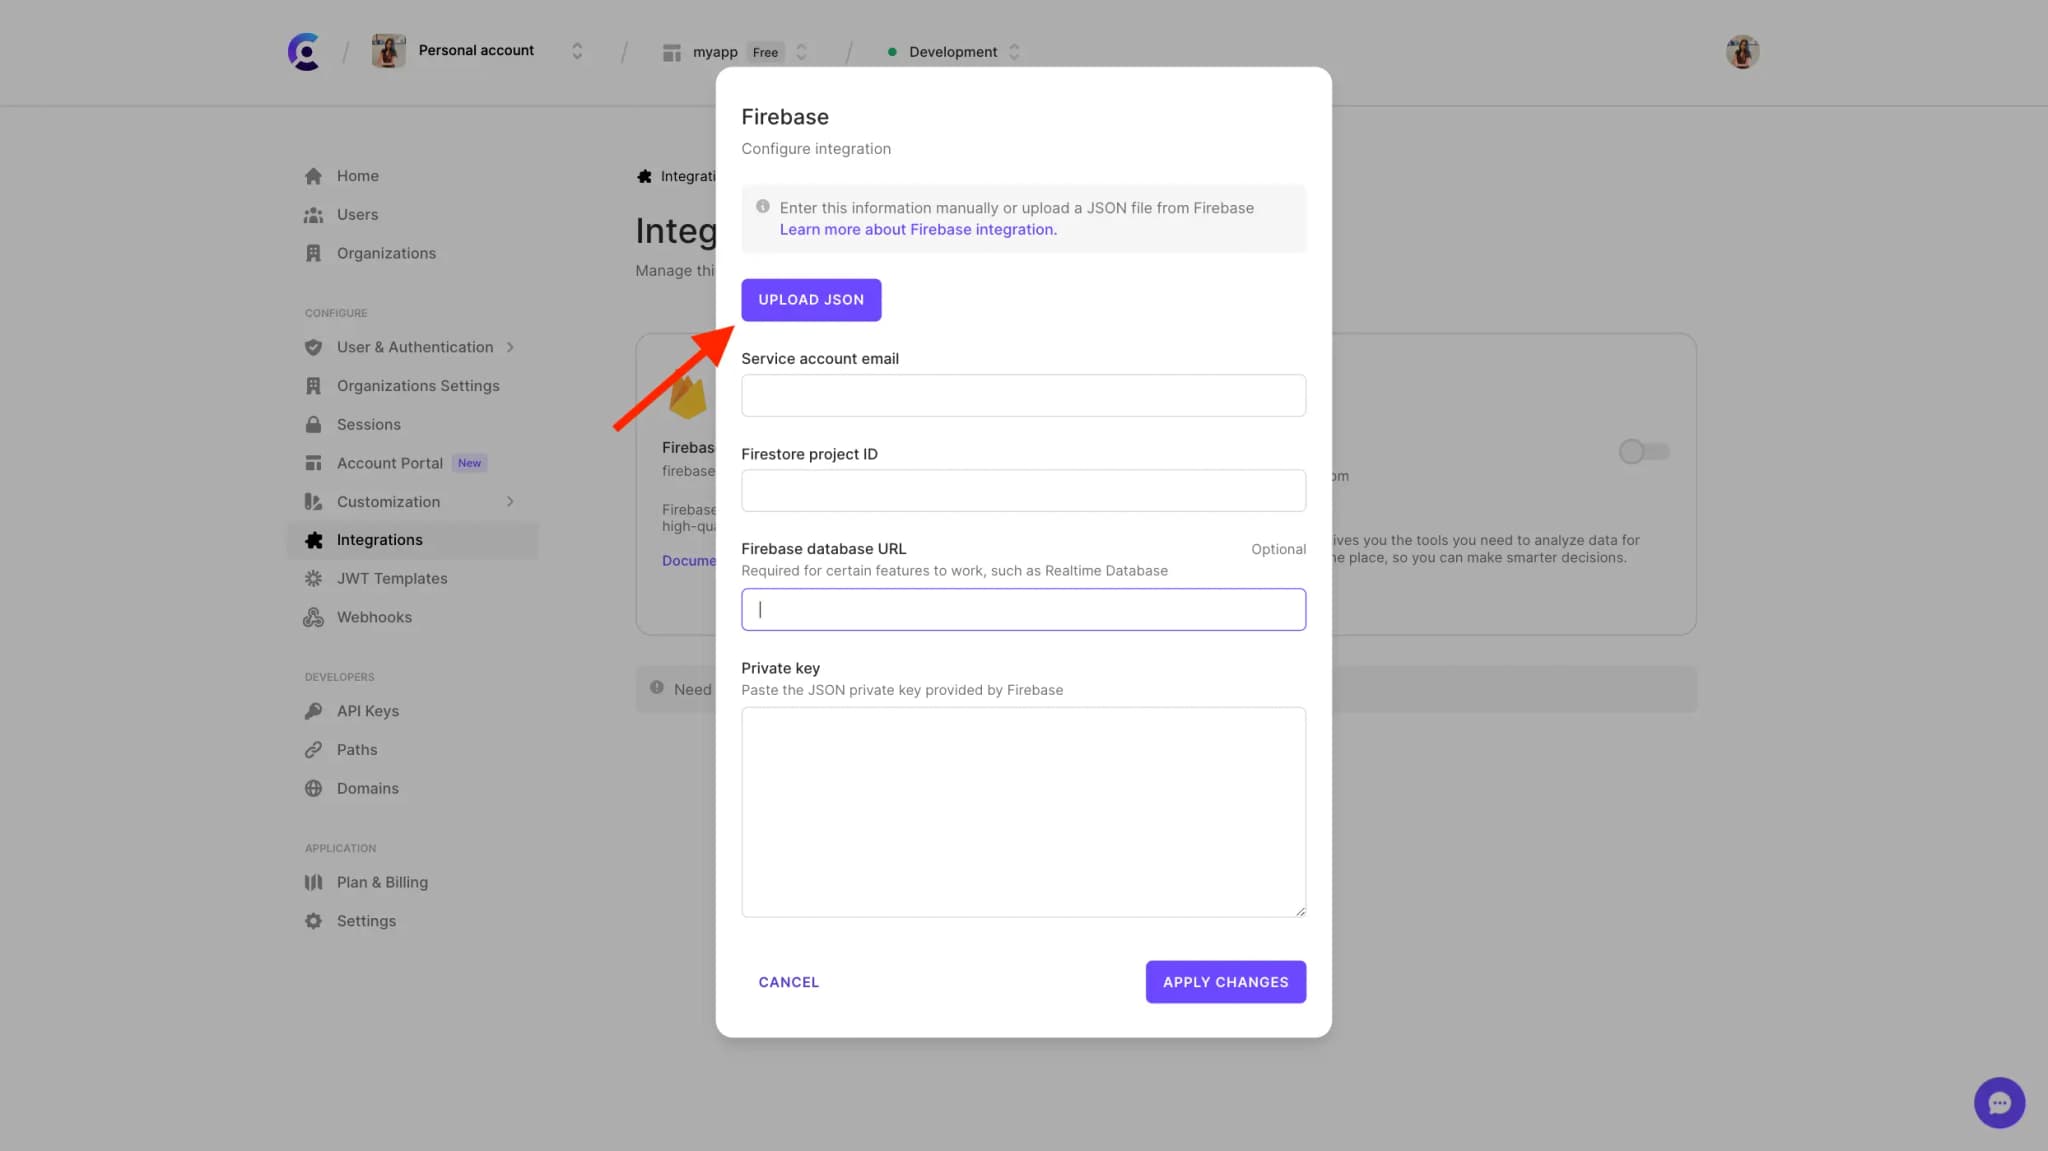
To upload the file to Clerk, click on the Upload JSON button on the Firebase integration screen inside the configuration modal.
Fill in the required attributes manually
The attributes that you need to fill in to connect Clerk with Firebase, as a custom authentication system, are described below.
- Service account ID - The service account ID can be found in the Google Cloud Console(opens in a new tab) for your Firebase project, or in the
client_emailfield of a service account JSON file. - Project ID - The Firebase project ID is the unique identifier of your Firebase project. Can be found under the Project Settings in the Firebase platform.
- Database URL (Optional) - The Firebase Realtime Database URL as retrieved from the Firebase platform under the Realtime Database page.
- Private Key - The private key used for signing which belongs to the Google service account ID of your project. Can be found in the Google Cloud Console for your Firebase project, or in the
private_keyfield of a service account JSON file.
Firebase user sign-in with Clerk as an authentication provider
After successfully completing the integration setup on in the Clerk Dashboard, you should set up your frontend to connect Clerk with the Firebase authentication system.
Retrieve a Firebase user authentication token from Clerk
The Firebase Web SDK requires an authentication token to sign in your users using Clerk as the custom authentication provider. This token can be retrieved calling the getToken method returned from the useAuth() hook and calling it with the integration_firebase template parameter.
await getToken({ template: "integration_firebase" });
The above method will return the token needed for the Firebase Web SDK to sign in your users with Clerk.
Sign in using the Firebase Web SDK
The Firebase Web SDK referenced is the browser installation of the official Firebase JavaScript SDK package on npm(opens in a new tab).
To authenticate your users on Firebase using Clerk, you would need to call the signInWithCustomToken method of the Firebase Auth scope.
import { getAuth, signInWithCustomToken } from "firebase/auth";

const auth = getAuth();
await signInWithCustomToken(auth, clerkCustomToken);
import firebase from "firebase";

await firebase.auth().signInWithCustomToken(clerkCustomToken);
An example implementation using Next.js:
import { useAuth } from "@clerk/nextjs";
import { initializeApp } from "firebase/app";
import { getAuth, signInWithCustomToken } from "firebase/auth";
import { useEffect } from "react";
import firebaseConfig from "../lib/firebase.config";

// Initialize Firebase app with config
initializeApp(firebaseConfig);

export default function Home() {
  const { getToken } = useAuth();

  useEffect(() => {
    const signInWithClerk = async () => {
      const auth = getAuth();
      const token = await getToken({ template: "integration_firebase" });
      const userCredentials = await signInWithCustomToken(auth, token);

      /**
       * The userCredentials.user object will call the methods of
       * the Firebase platform as an authenticated user.
       */
      console.log("user ::", userCredentials.user);
    };

    signInWithClerk();
  }, []);

  return (
    <main>
      <h1>Hello Clerk + Firebase!</h1>
    </main>
  );
}