Integrate Fauna with Clerk
The first step is to create a new Clerk application from your Clerk Dashboard if you haven’t done so already. You can choose whichever authentication strategy and social login providers you prefer. For more information, check out our Set up your application guide.
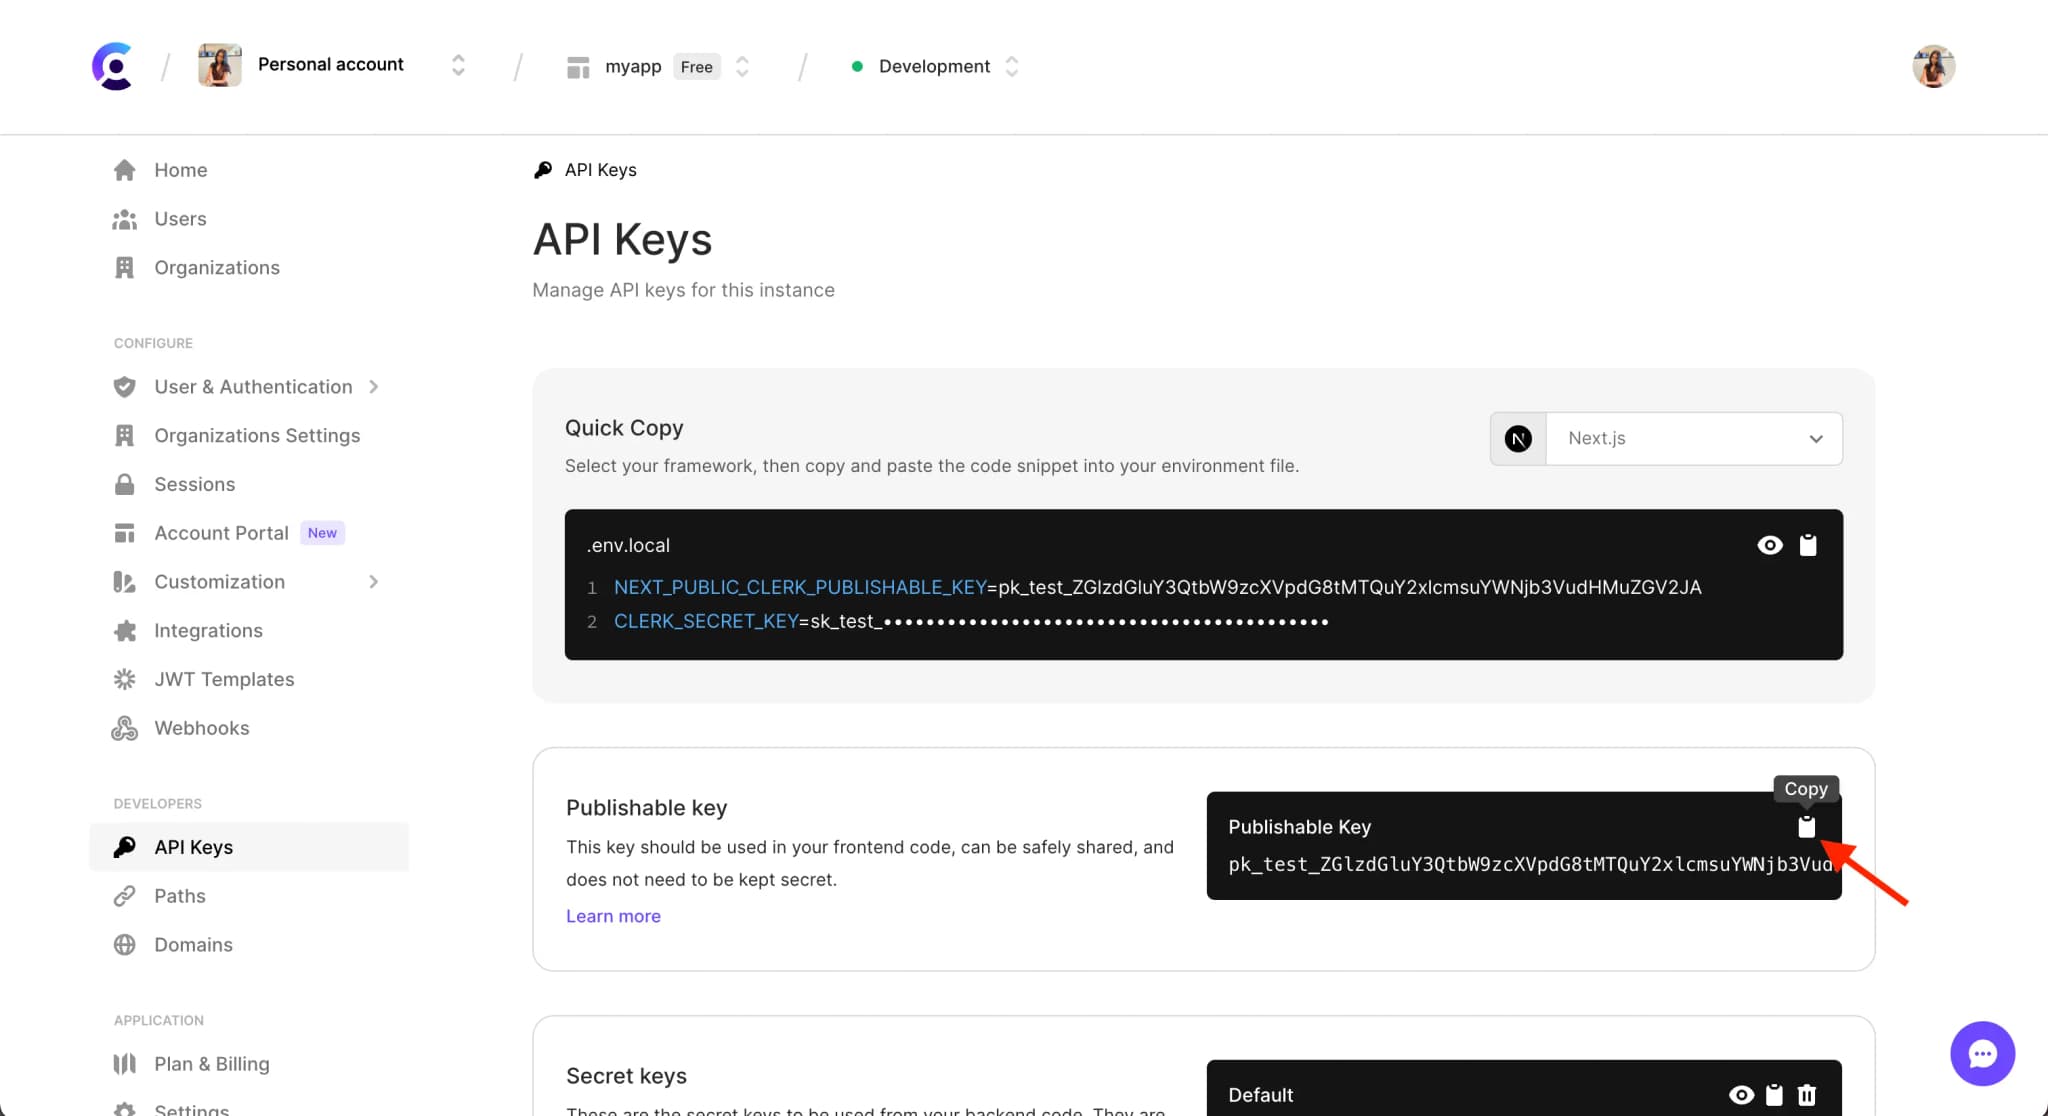
After your Clerk application has been created, in the Clerk Dashboard, navigate to the API keys(opens in a new tab) page and copy your Publishable key.

The next step is to head over to the Fauna database that you want Clerk-authenticated users to access. Click on the Security link on the left-hand navigation and then the Providers tab.

Click the New Access Provider button.
Enter a name in the Name field that will identify this access provider. The recommendation is to use “Clerk”.
Paste the Publishable key you copied from the Clerk Dashboard into the Issuer field and then prefix it with the https:// protocol so it follows https://<YOUR_PUBLISHABLE_KEY>
Make sure you do not add a trailing slash / to the end of the Issuer URL or it will fail.
Assuming you didn’t use a custom signing key, set the JWKS endpoint field to the JSON Web Key Set (JWKS) URL Clerk automatically created with your Frontend API at https://<YOUR_FRONTEND_API>/.well-known/jwks.json
You can find this URL in the Clerk Dashboard on the API keys(opens in a new tab) page. Scroll down and click on Advanced. In the JWT public key section, copy the JWKS URL.

The last part is to select a role that will be assigned to authenticated users. The Role(opens in a new tab) defines the access privileges and domain-specific security rules. You can specify multiple roles if necessary.
The completed provider form should resemble the following:

Before clicking the Save button, copy the Audience URL and then go ahead and save.
Create a new Fauna JWT template
In the Clerk Dashboard, navigate to the JWT Templates(opens in a new tab) page. Click on the New template button to create a new template based on Fauna.

Once the Convex template is created, you will be redirected to the template's page. You can now configure the template to your needs.

Scroll down to the Claims section and set the aud claim to the Audience URL you copied from Fauna. The URL format should be https://db.fauna.com/db/<YOUR_FAUNA_DB_ID>.

You can include additional claims if you’d like, but aud is the only required one. Shortcodes are available to make adding dynamic user values easy.
Don't forget to click the Apply changes button at the bottom right to save your Fauna JWT template.
Authenticating Fauna queries
The way to authenticate requests to Fauna with Clerk is to use a JWT. After adding the necessary claims in a JWT template, you can generate the token by calling the getToken method from the useAuth() hook provided by Clerk.
import { useAuth } from '@clerk/nextjs'; import faunadb from 'faunadb'; const q = faunadb.query; const Example = () => { const { getToken } = useAuth(); const [userId, setUserId] = React.useState(); const makeQuery = async () => { try { // TODO: Update with your JWT template name const secret = await getToken({ template: 'fauna' }); const client = new faunadb.Client({ secret, keepAlive: false }); const id = await client.query(q.CurrentIdentity()); setUserId(id); } catch (e) { // Handle error setUserId(null); } }; return ( <> <button onClick={makeQuery}>Make authenticated query</button> <p>User ID: {userId}</p> </> ); };
The getToken({ template: <your-template-name> }) call is asynchronous and returns a Promise that needs to be resolved before accessing the token value. This token is short-lived for better security and should be called before every request to your Fauna database. The caching and refreshing of the token are handled automatically by Clerk.
Next steps
- Replace the Fauna JavaScript driver(opens in a new tab) with a GraphQL client like Apollo(opens in a new tab) or graphql-request(opens in a new tab).
- Try adding some custom claims to the JWT token.