

Session options
Clerk provides session management options for fine-tuning user visits to your application, including options for session lifetime, multi-session handling, and session token customization.
Session lifetime
Depending on the business domain of an application, there might be different requirements for how long users should remain signed in. Criteria to base this decision upon typically revolve around user activity on the application and how long it has been since the user first signed in.
Ultimately, picking the ideal session lifetime is a trade-off between security and user experience. Longer sessions are generally better for UX but worse for security; and vice-versa.
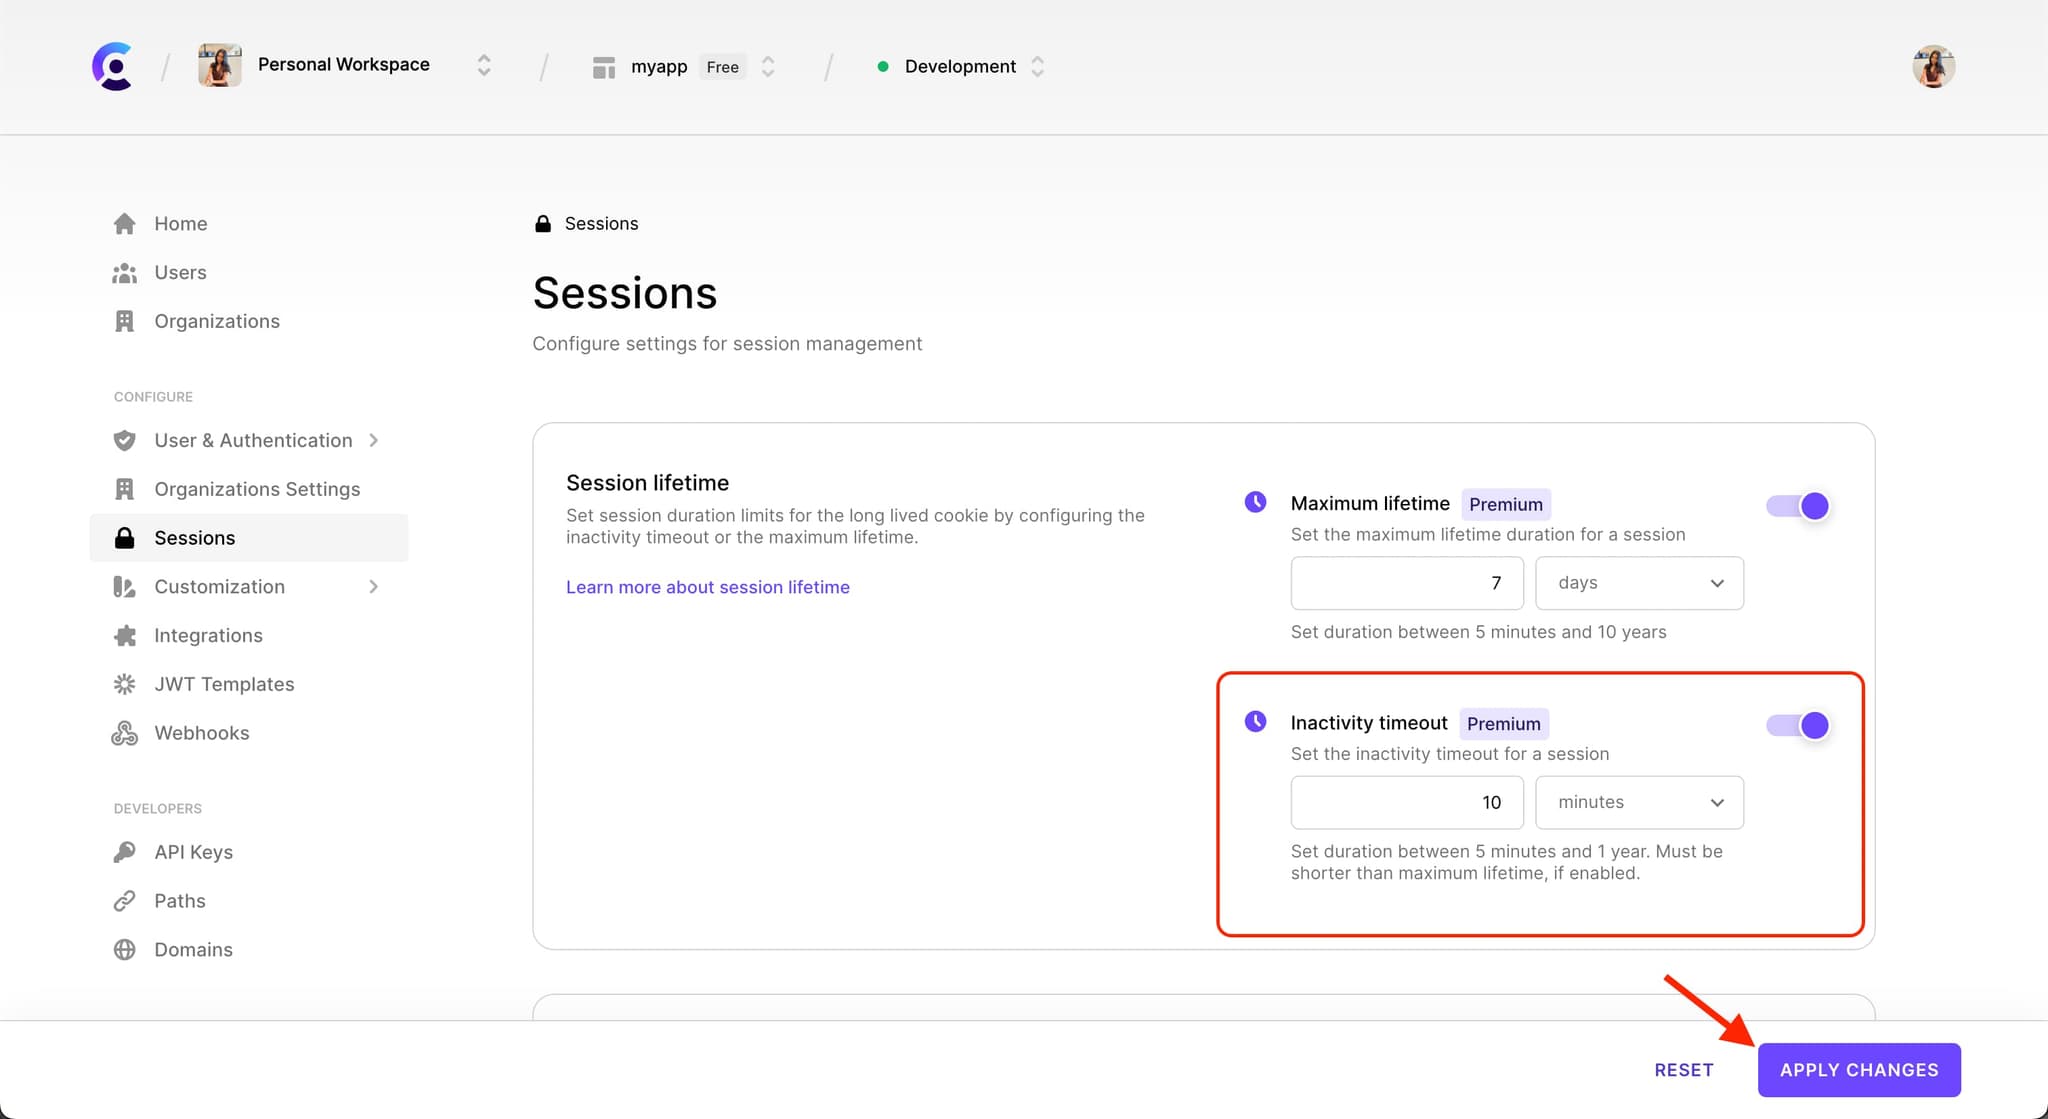
Fortunately, with Clerk you have to ability to fully control the lifetime of your users' sessions. There are two settings for doing so and you can set them via your instance settings in the Clerk Dashboard(opens in a new tab): Inactivity timeout and Maximum lifetime.
Note that either one or both must be enabled at all times. For security reasons, you are not allowed to disable both settings.
Inactivity timeout
Denotes the duration after which a session will expire and the user will have to sign in again, if they haven't been active on your site. By default, this setting is disabled for all newly created instances. To enable it and set your desired value, in the Clerk Dashboard, go to Sessions(opens in a new tab).
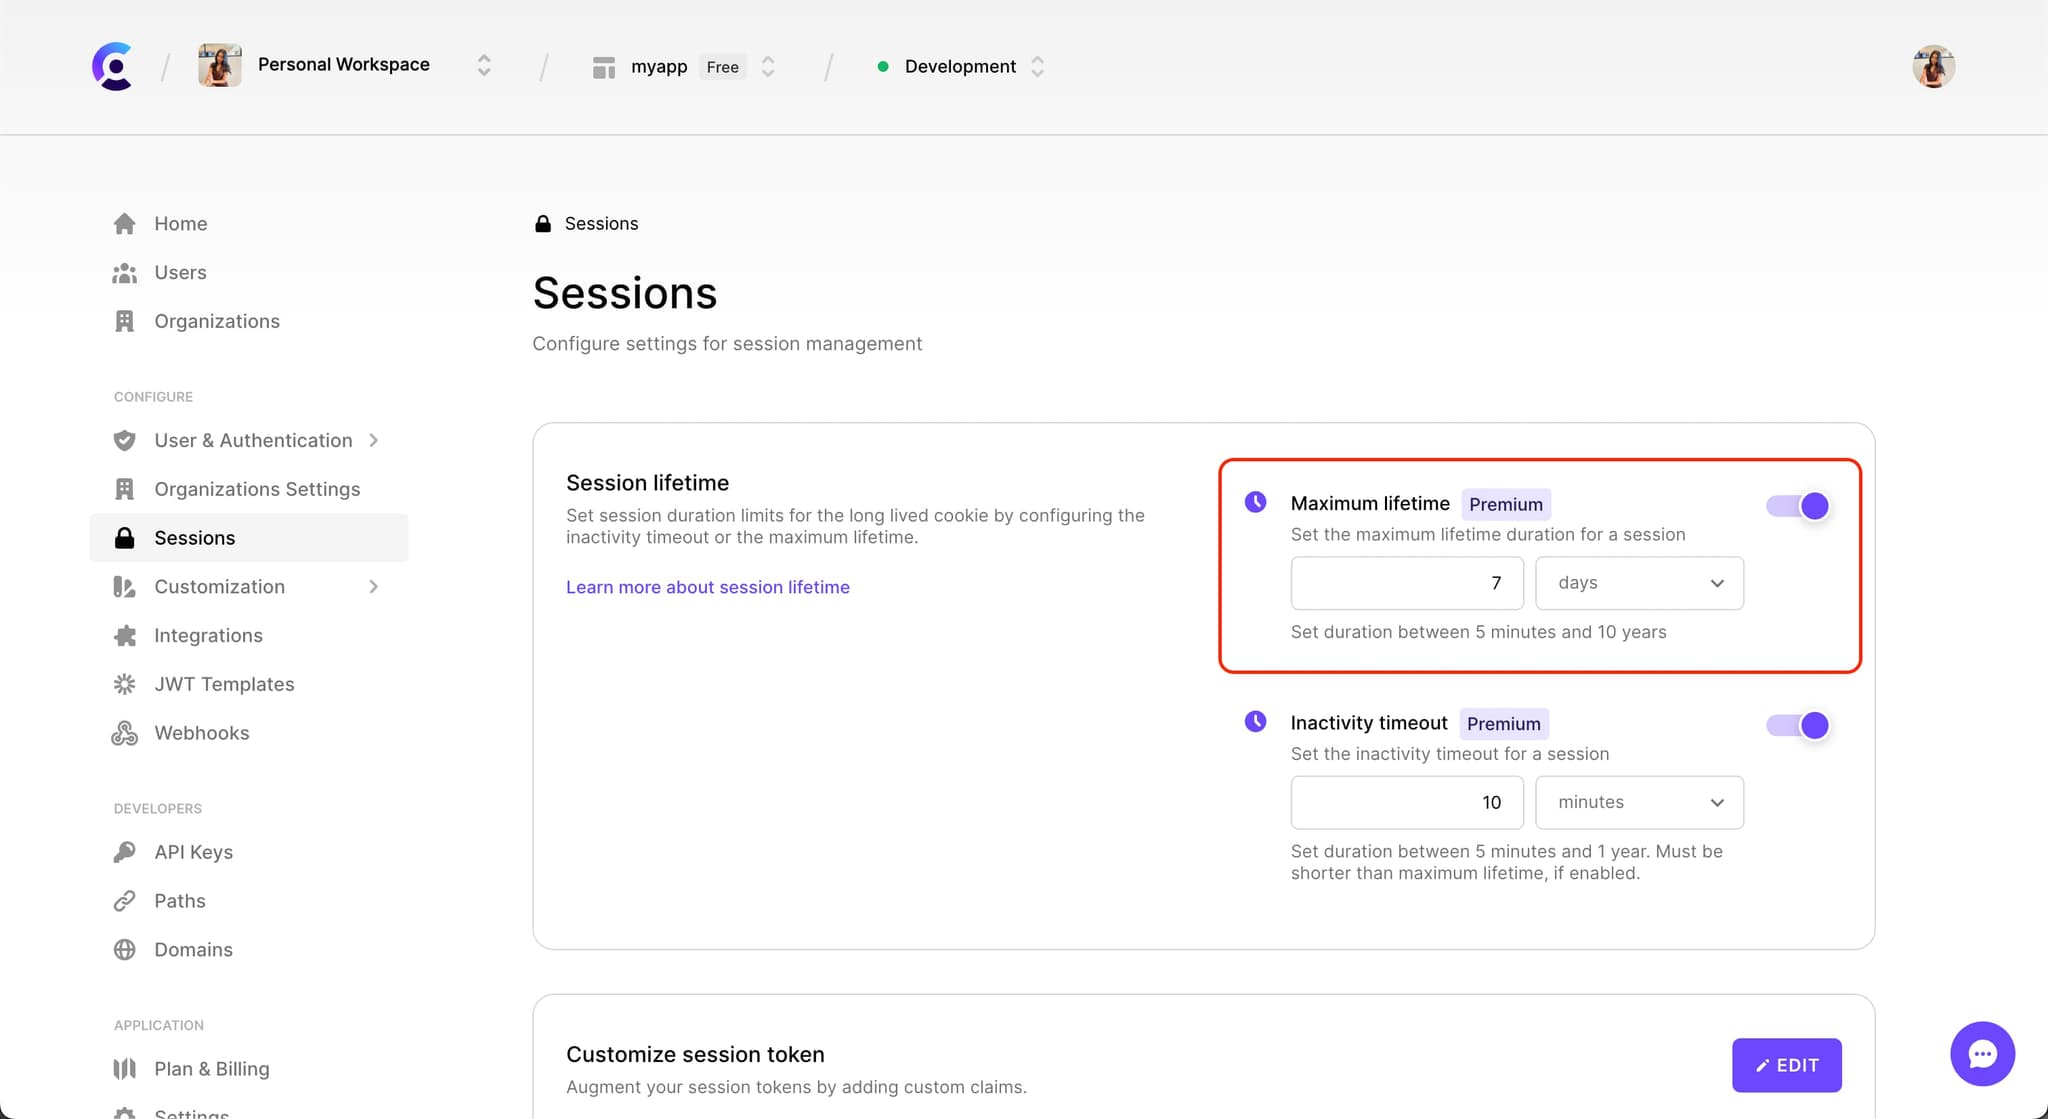
Maximum lifetime
Denotes the duration after which a session will expire and the user will have to sign in again, regardless of their activity on your site. By default, this setting is enabled with a default value of 7 days for all newly created instances. To find this setting and change the value, in the Clerk Dashboard, go to Sessions(opens in a new tab).
Multi-session handling
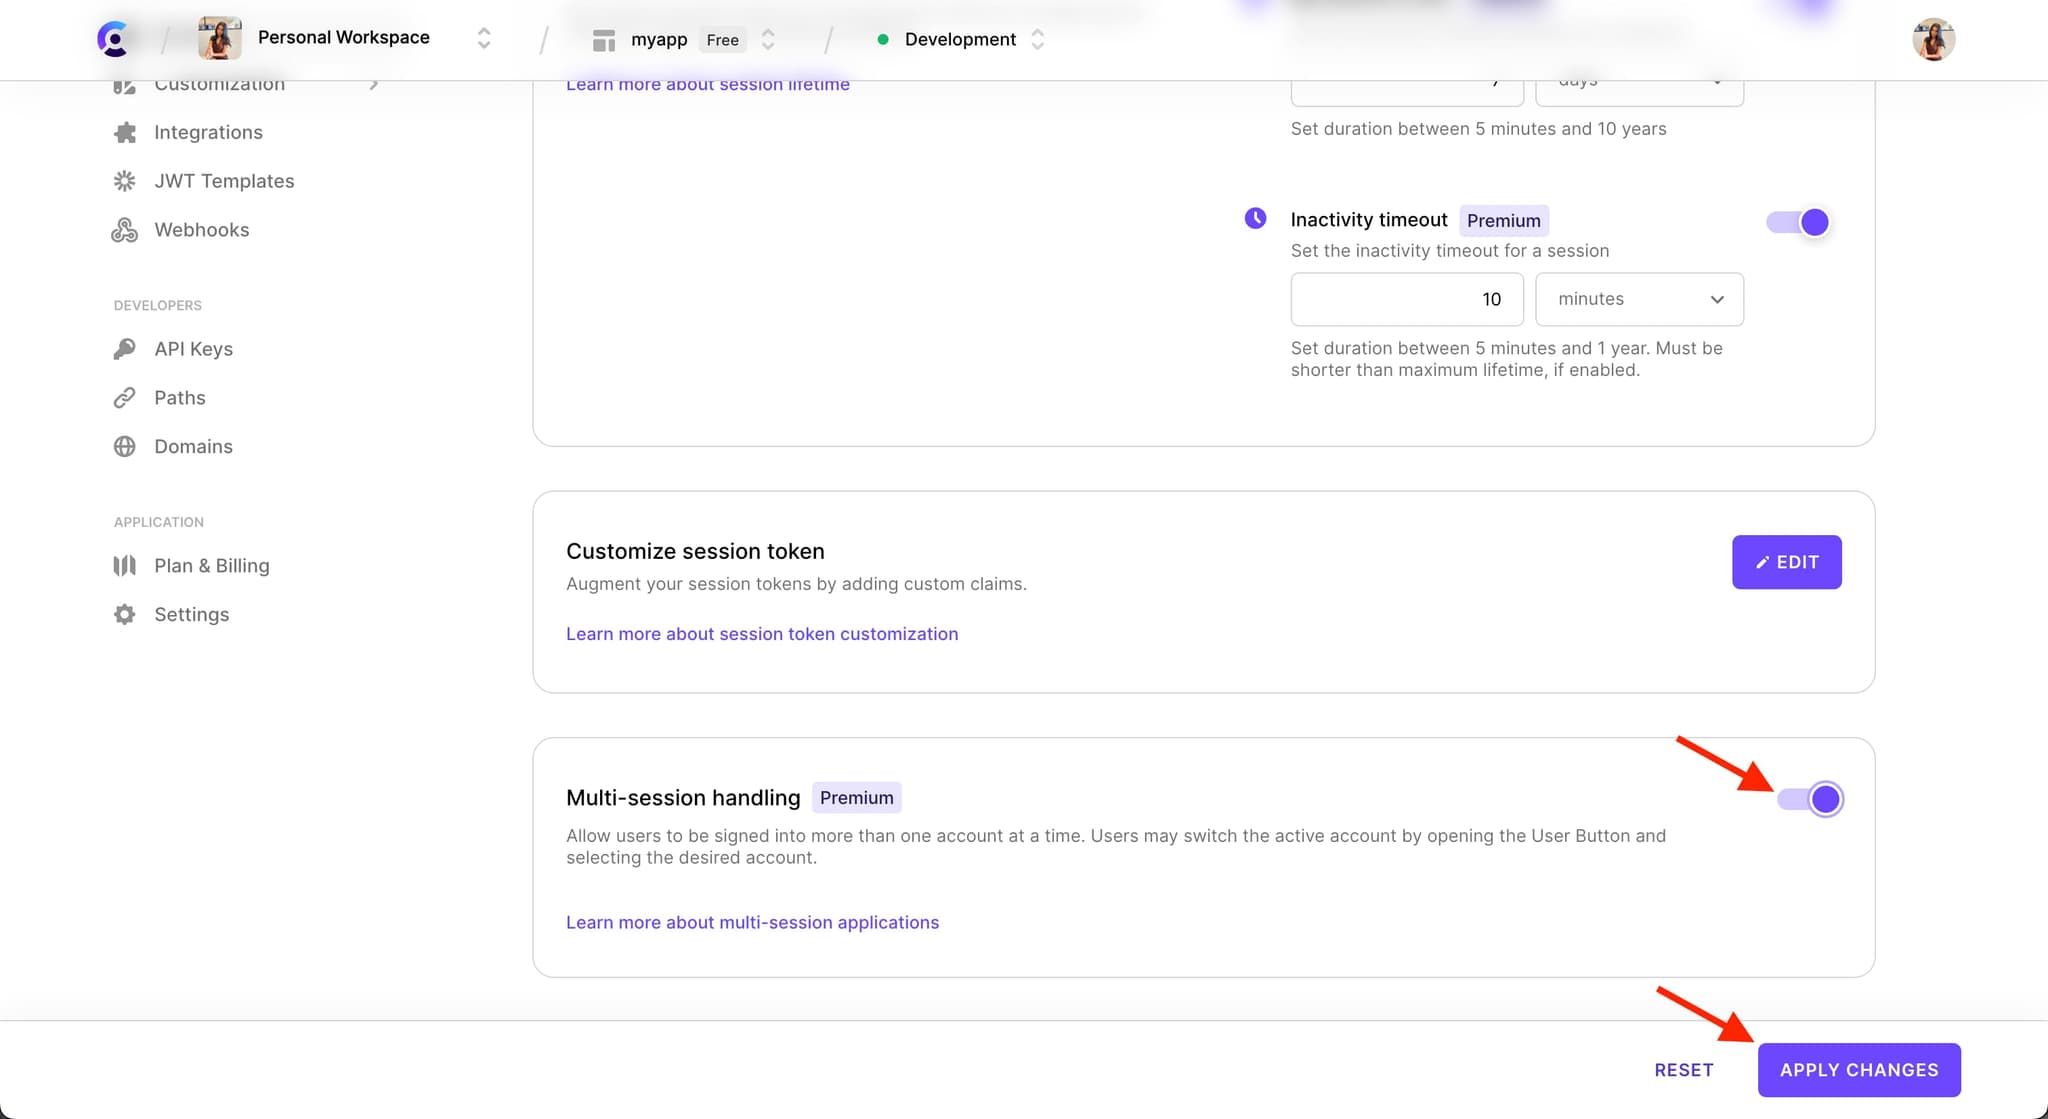
Multi-session applications allow users to be signed into more than one account at a time from the same browser. Users may switch the active account by opening the <UserButton /> and selecting the desired account.
To enable this feature in your application, in the Clerk Dashboard, go to Sessions(opens in a new tab). Turn on the Mutli-session handling toggle.
Learn more about working with multi-session applications with Clerk components and custom flows in our detailed guide.
Customize session token
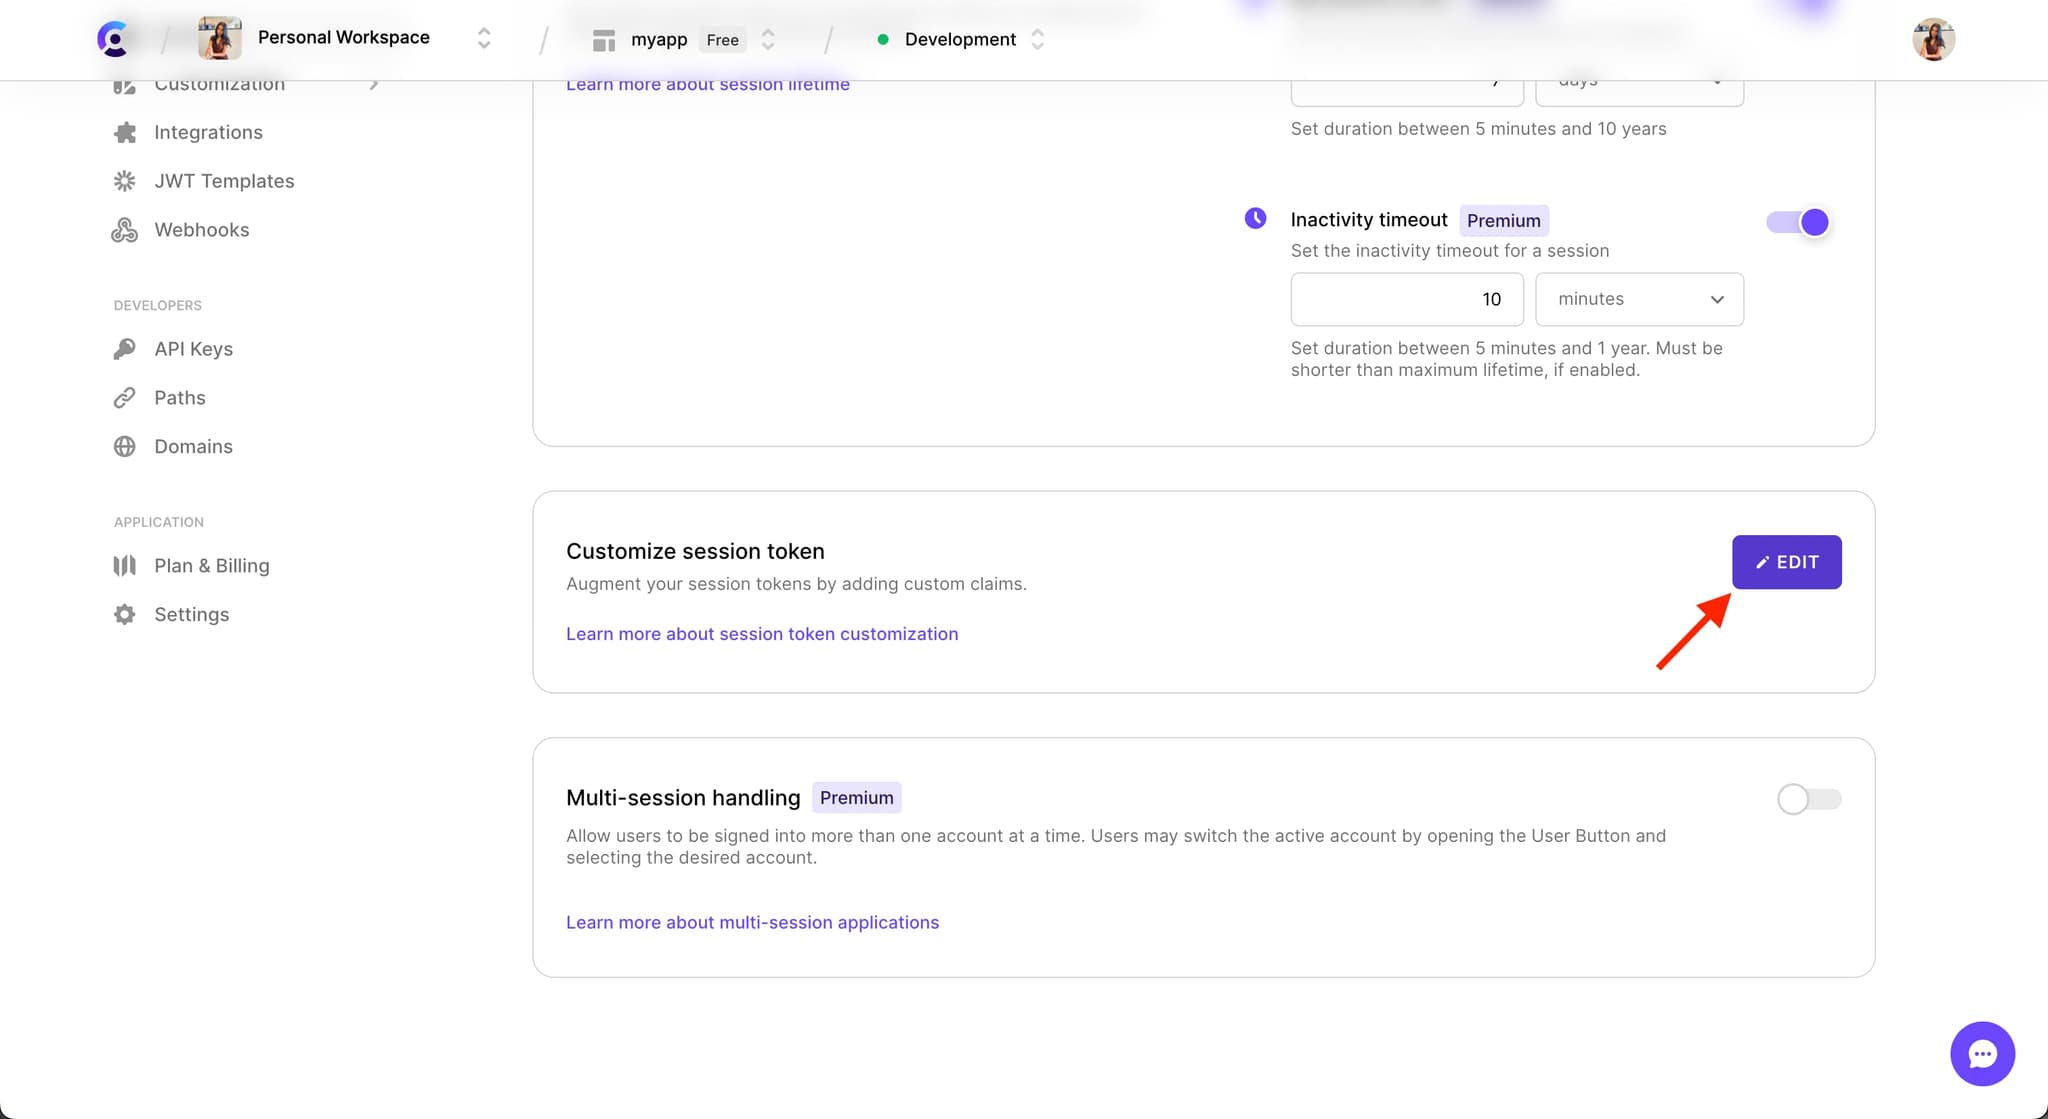
Session tokens are JWTs that contain a set of standard claims required by Clerk, but there are times when you want to augment these tokens by providing additional claims of your own.
To add custom claims to the session token, in the Clerk Dashboard, go to Sessions(opens in a new tab). In the Customize session token section, click on the Edit button. This will open a modal window where you can add claims and even use our handy shortcodes.
To read more about the Clerk standard claims and customizing these tokens with JWT Templates, check out our session token customization guide.