

Sign-up options
Clerk provides various options for setting up a sign-up flow. These options are configurable from the Clerk Dashboard(opens in a new tab). When a new application is created, you will be presented with the following screen:
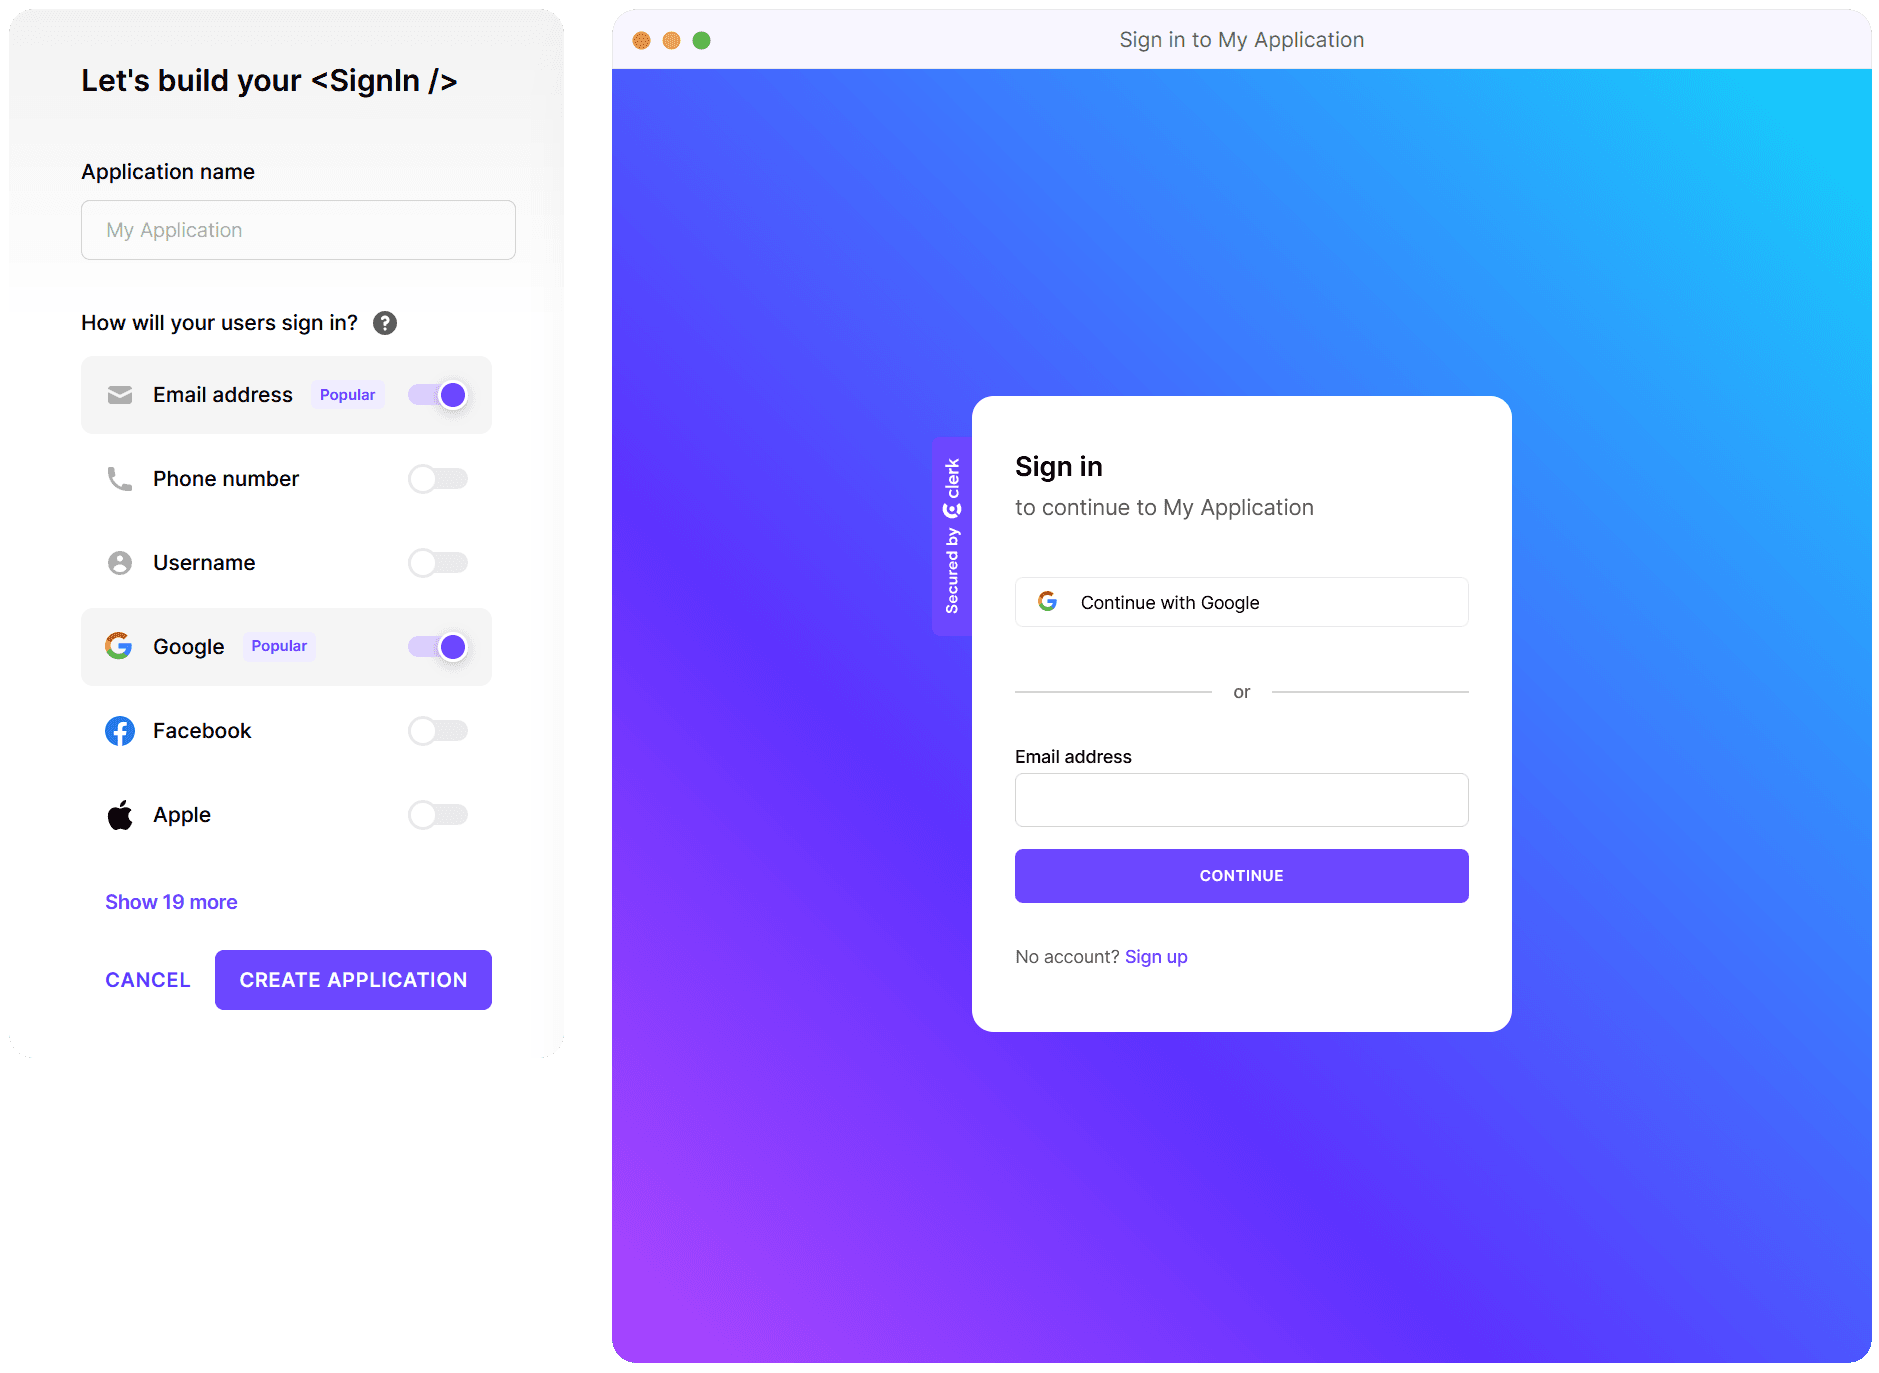
In addition to the application name set for your instance, there will be standard authentication options to choose from: identifiers, authentication strategy, social login providers, and Web3 authentication.
You can always make changes to your sign-up options after your application has been created by visiting the Clerk Dashboard and navigating to the User & Authentication settings.
Choose identifiers
From the application configuration screen, you must choose one of the following identifiers: email address, phone number, or username. You can select multiple identifiers if you like, but at least one is required to continue.
Email address is the most common primary identifier. During the sign-up process, a user must supply and verify their email address. They must keep an email address on their account at all times. However, the email address that was used for registration can be later changed from the user's profile screen.
When phone number is selected as the identifier, users will sign up with their mobile phone numbers and receive an SMS text message with a code to verify their phone number. (Note: SMS authentication is a premium feature and is not available on the Free plan. Upgrade your plan(opens in a new tab) to enable this feature.)
Choosing username as the identifier enables users to sign up without requiring personal contact information. A username should be from 4 to 64 characters in length and can contain alphanumeric characters, underscores (_), and dashes (-).
If you opt not to collect any contact information, you could choose Username and later turn it off in settings and only authenticate with an OAuth social provider.
Choose authentication strategy
There are two available authentication strategies to choose from: password or passwordless.
Choosing a password strategy requires users to set a password during the sign up process. Clerk offers out of the box protection against weak and leaked passwords and the only requirement enforced is that the password be a mimum of 8 characters. (Note: passwordless authentication is still available to users even if password strategy is selected.)
Choosing a passwordless strategy involves a user signing up with an email address or phone number and then receiving a one-time verification code to complete the authentication process. While a one-time code is the default passwordless option, an email verification link (also known as a magic link) is another passwordless authentication option that can later be enabled in settings.
Choose social login providers
Clerk offers a number of Social Login providers that can be used during sign up and sign in. What makes the OAuth with Social Login providers appealing is that users often won't need to enter additional contact information since the provider already has it. The Social Login process is smart enough to automatically convert the sign up process of an existing user into a sign in flow, and the reverse is also true.
For each provider, Clerk offers a shared profile that can be used for development instances. This makes it easy to get up and running and test your Social Logins right away. However, production instances must use a custom profile with your own credentials.
Choose Web3 authentication
Clerk provides Web3 authentication as an option with MetaMask. As part of validating the accuracy of the returned Web3 account address, Clerk handles the signing of a transaction and verifying the signature. Because sign-in with MetaMask uses the same abstraction as our other authentication strategies, like passwords or magic links, other Clerk features like multi-factor authentication and profile enrichment work for MetaMask users out-of-the-box.
Set up multifactor authentication
Although not available as an option in the initial new application screen, you can opt to turn on multifactor authentication (MFA) from the configuration screen. In the Clerk Dashboard, go to User & Authentication > Multifactor(opens in a new tab) and toggle on the multi-factor options you would like to enable. For more information on how to set up multifactor authentication, check out our detailed guide.
Set sign-up restrictions
Clerk provides a set of restriction options designed to provide you with enhanced control over who can gain access to your application. Through these restriction settings, you can limit sign-ups or prevent accounts with specific identifiers from accessing your application. These identifiers can be email addresses, phone numbers, and even entire domains. Learn more about restrictions in our detailed guide.